|
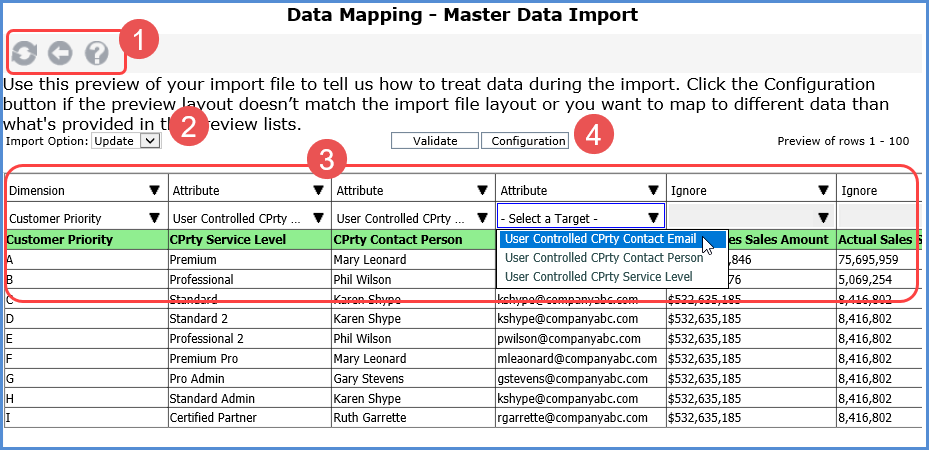
Toolbar -
|
 |
Import Option – Choose Update or Replace. An Update will update existing data and add any new data included in the import file. A Replace clears existing data for all of the User Controlled Attributes that belong to the import’s Target dimension then adds data from the import file to the applicable attributes. Care should be taken when using a Replace since it removes data for all of a dimension’s User Controlled Attributes even if the attributes aren’t included in the import file. If there is existing data you don’t want to lose, then set the import configuration to Update instead of Replace. See also When To Do An Update Vs. When To Do A Replace For Your Master Data Imports. |
|
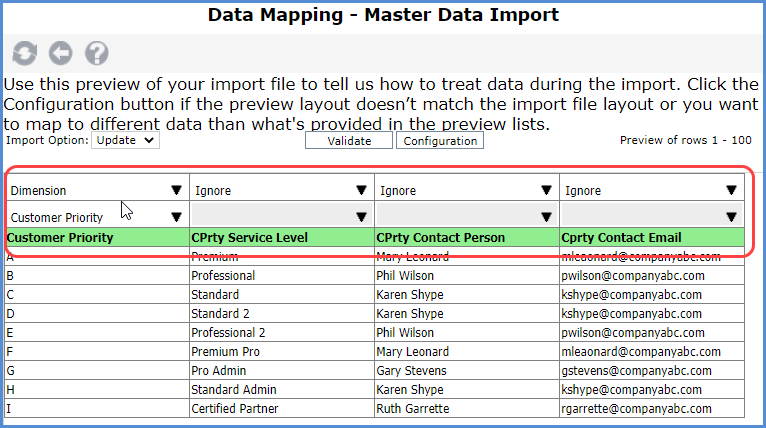
Data Mapping Preview – This section shows up to a 100-row preview of your import file. The drop-down lists in the first two rows are for use in mapping import file data to Stratum – use them to tell Viewer what’s in each column, what to do with the data during the import, and what columns if any to ignore. Row(s) highlighted in green are the start of you import file and what you indicated to Viewer were the header rows in the file (through a property in Import Configuration). Note: Header rows contain descriptive details that aid you in mapping but do not get imported. For example, the header rows contain dimension names, descriptions, and attribute names. This example shows a progression of identifying what’s in your import file using drop-down lists in the mapping window. As you do more imports in Viewer after your initial one, some mapping may be done for you automatically based on what Viewer has learned about your prior import habits. You can change automatic selections if needed. Here is the initial state of the import preview. Viewer was able to map the first column to a dimension through automatic mapping. That column mapped to the Type of Dimension and a Target dimension of Customer Priority. All other columns defaulted to Ignore. Also, Master Data Import assumed that the import file had one header row, which is the row displayed with a green background.
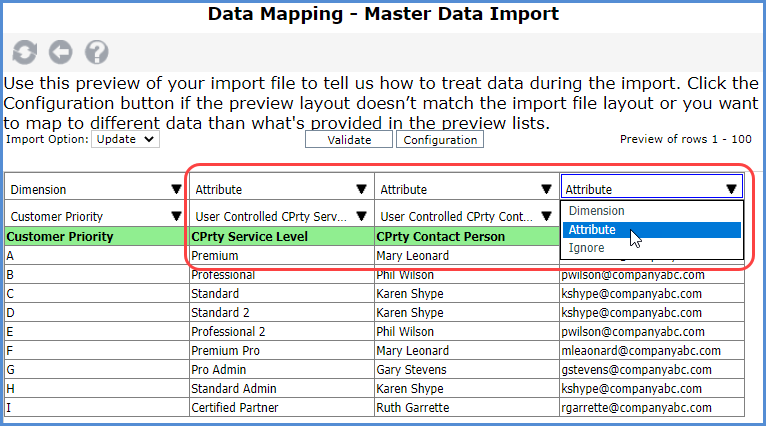
Drop-down lists for the next three columns were used to identify each of them as attributes. They have the values to be import for the dimension. For each column, Attribute was chosen for the type then the Target drop-down lists for each column were used to choose the User Controlled Attributes to receive the imported data. These types of attributes must be set up in advance of the import using Viewer’s User Controlled Attribute Maintenance functionality.
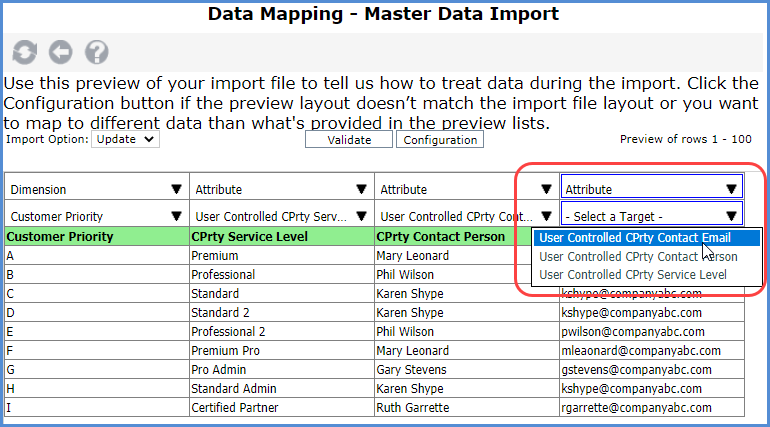
Here’s the Target attribute being selected for the last attribute column in the preview. The mapping is complete, and the user can process the import.
|
|
Validate – Click anytime while mapping your data to validate the mapping. If Viewer encounters something like a row that’s missing key values for the Target dimension or mapping selections that are required but haven’t been made yet, it will present a message about those issues. Configuration – Click to access the Import Configuration window. From there, you can edit basic properties that tell Viewer how to treat the import file, the Target dimension, and how many header rows are in the import file. |