There are two ways to configure your Master Data Imports. They can be set up to do an Update or a Replace, and the choice impacts the treatment of existing data. More information and examples follow to help you decide what type of import to use.
An Update is the more common type of import. It’s the default configuration for Master Data Imports. An Update will update existing data and add any new data included in the import file.
A Replace is the less commonly used type of import. It clears existing data for all of the User Controlled Attributes that belong to the import’s Target dimension then adds data from the import file to the applicable attributes.
When might you need to do a Replace? You want to start over with a clean slate for a dimension. For example, you’ve done multiple imports for a dimension and want to start over with a fresh set of data or you mistakenly added new key values to the dimension and aren’t using them.* A replace deletes all data for all of the dimension’s User Controlled Attributes and removes any unused dimension key values added by past Master Data Imports – unused key values are those that don’t have any measure data. Key values that have measure data won’t be removed by a Replace.
Care should be taken when using a Replace since it removes data for all of a dimension’s User Controlled Attributes. If there is existing data you don’t want to lose, then set the import configuration to Update instead of Replace.
Make sure the import file you use for the Replace includes all User Controlled Attributes for all key values you want updated for the dimension.
*Note: To avoid adding new key values you don’t need, make sure your import file only includes rows for the desired key values you want to update. See also the topic ‘What Does “Import File Contains Key Values That Don’t Currently Exist In Stratum” Message Mean?’.
The following examples show an Update and a Replace to illustrate cases when you might choose to use each type of import.
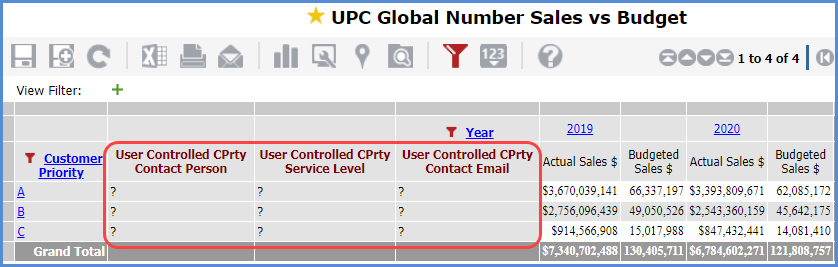
This view has three new User Controlled Attributes for the Customer Priority level. Their default value of “?” displays because no master data has been imported yet. Data will be added with an Update type of Master Data Import.
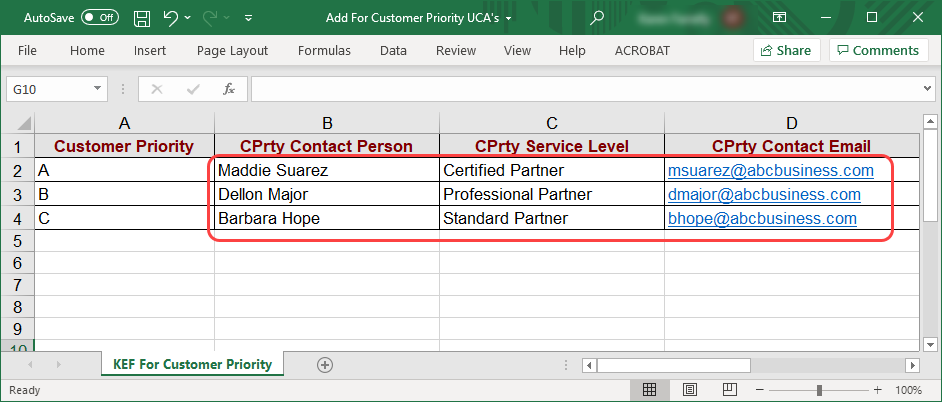
Here’s the import file showing data to be added.
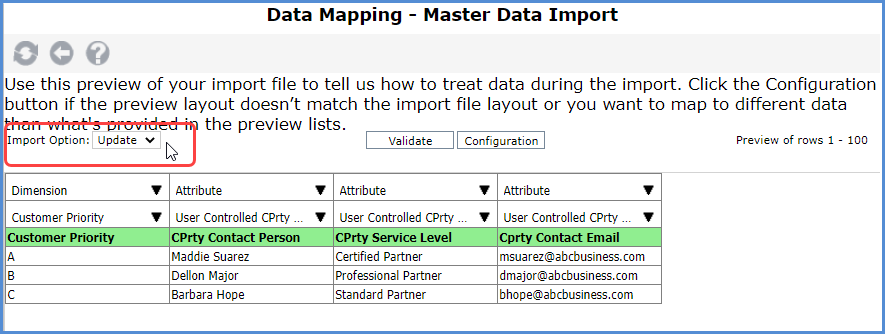
The import data is mapped to the appropriate attributes. Import Option is left at the default of Update.
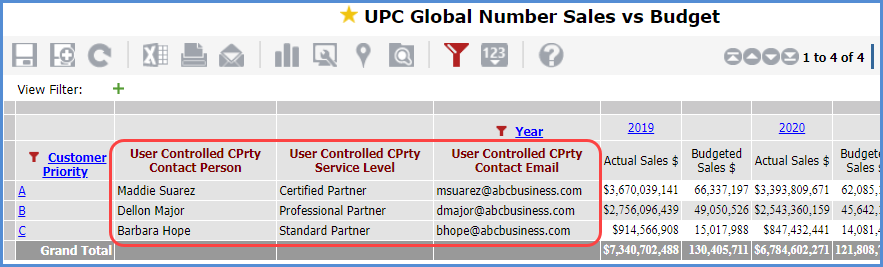
Here’s the view after the import was finished. Attribute columns show their new data. The user can change any of this attribute data in the future, if needed, by doing another Update import. The images that follow this view show how another Update accomplishes that.
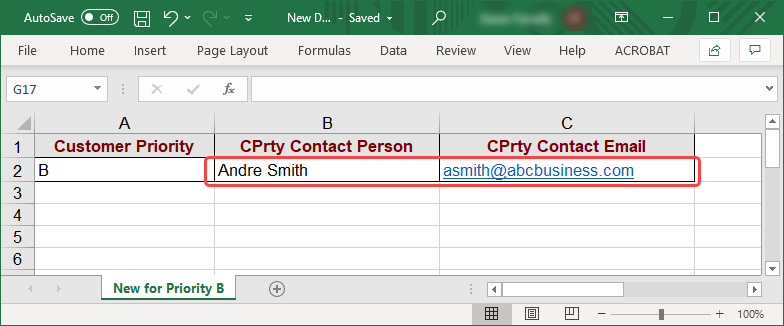
The contact person and email attributes for Priority B need to be changed at some point after the initial import. This import file shows the new data for Priority B.
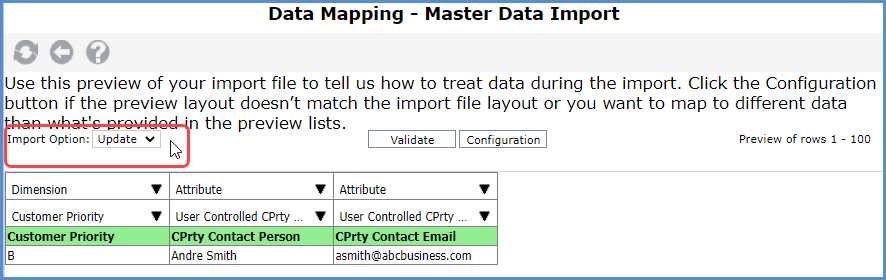
Next is the mapping window set up to do this Update.
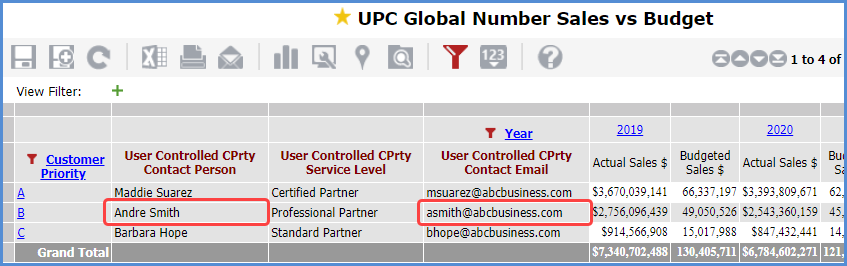
Here’s the view reflecting the changed data after the import was completed. No other data changed other than what was included in the import file.
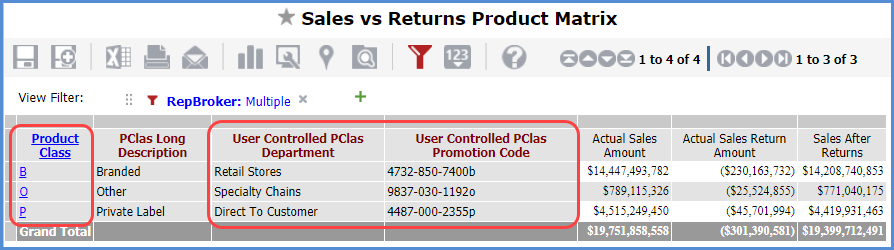
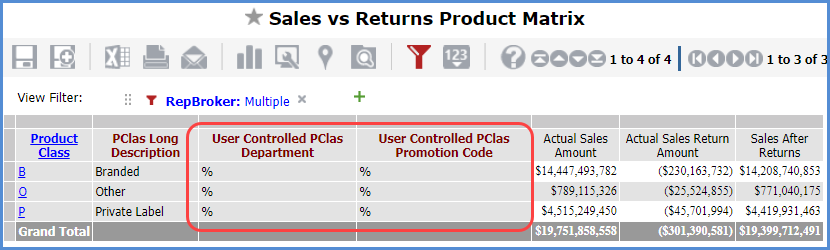
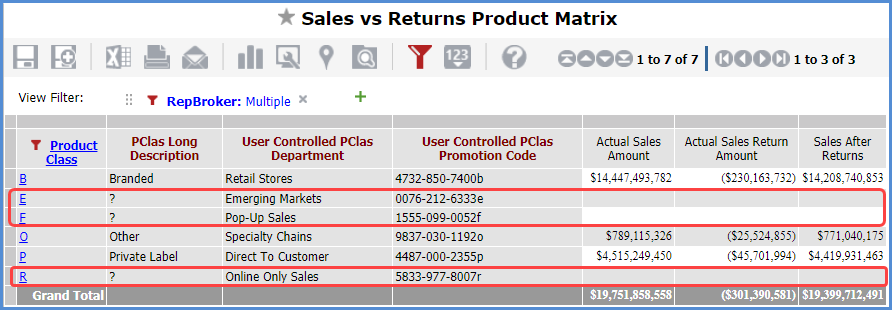
This view shows all existing members (key values) for the Product Class level and two new User Controlled Attributes for the level. The default value of “% displays for the attributes because no master data has been imported yet. Data will be added with a Master Data Import.
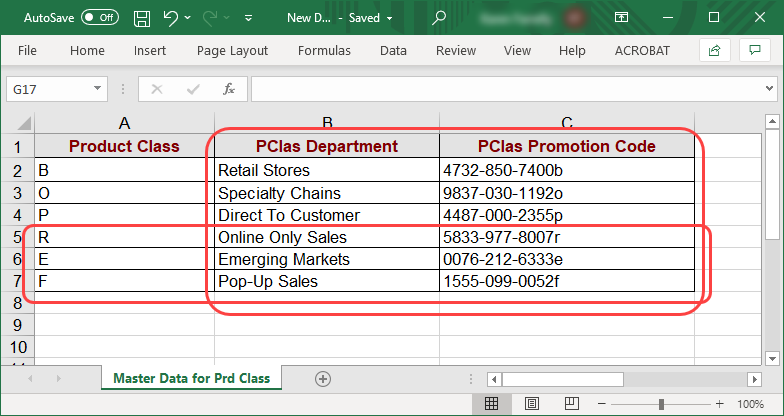
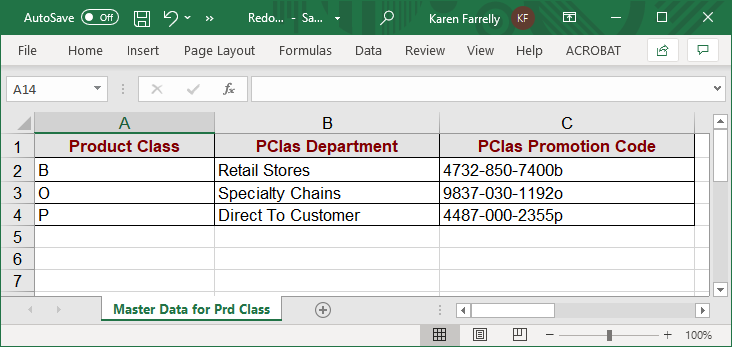
This import file is used for the import. The user overlooks the fact that the file includes key values R, E, and F that do not exist in Stratum yet – values the user does not mean to add to Stratum.
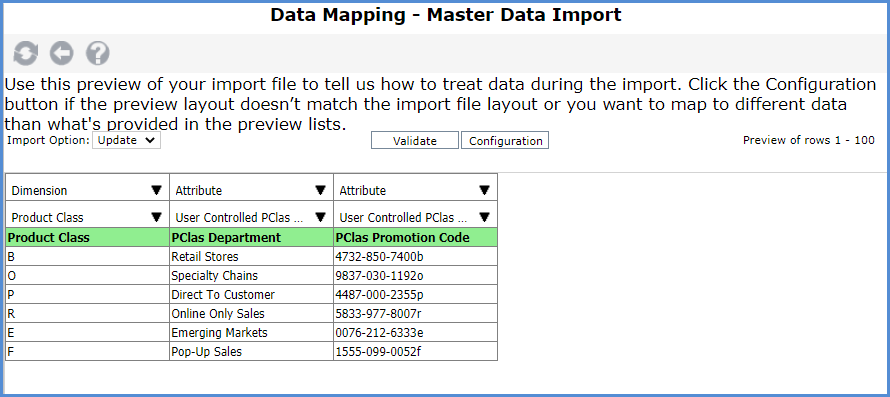
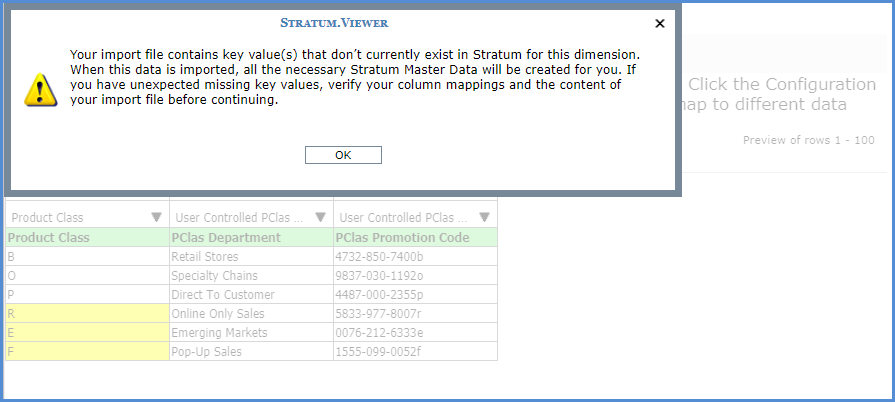
The user maps the data and proceeds with the import, still overlooking the new key values in the import file and that displayed in the mapping window. They also ignore an import validation message that tells them to check their import file if they did not intend to add new key values.
Here’s the view after the import was finished. Attribute columns show their new data. There are rows for the new key values. At this point, the user realizes their mistake of including new key values in their import file. Revising the import file and doing an import type of Replace will remove the unwanted values. The rest of this topic shows that Replace.
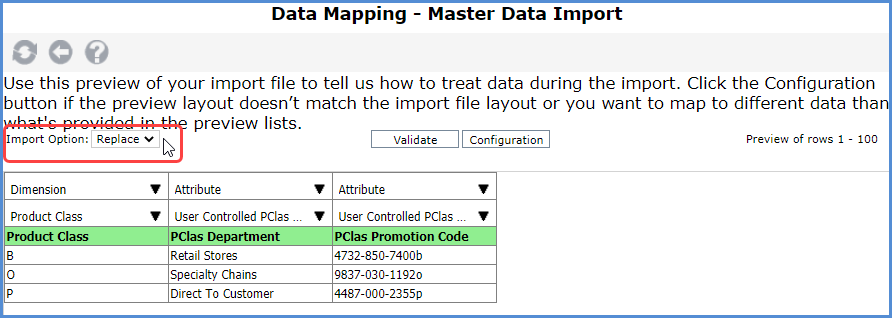
The original import file is revised to remove the unwanted new key values. The rest of the content is left the same as used in the prior import.
The Import Option is set to Replace in the mapping window. The Replace will clear all master data for all User Controlled Attributes, clear the new key values because they do not have measure data yet, and then import the attributes data for the key values in this iteration of the import file.
Here’s the view after the Replace was carried out. Only the desired Product Classes B, O, and P show up. Their User Controlled Attributes show the imported data. The unwanted key values R, E, and F were removed.