One way to set up your Excel spreadsheet import file is to include the transaction dates for your import data in a single column of the file. This type of import is known as a Transactions import file and means you will set the import configuration properties to the Transaction type. The following import file is set up that way. Read on to see key parts of the file and how it was imported.
Note: See also the video How It Works: Stratum Data Import and the topic Excel Import File Types: Transactions Or Time Series. Note that Transactions format is the only option for other file types or tables used for your imports (CSV, Text, local SQL Server Database, Azure SQL Database).
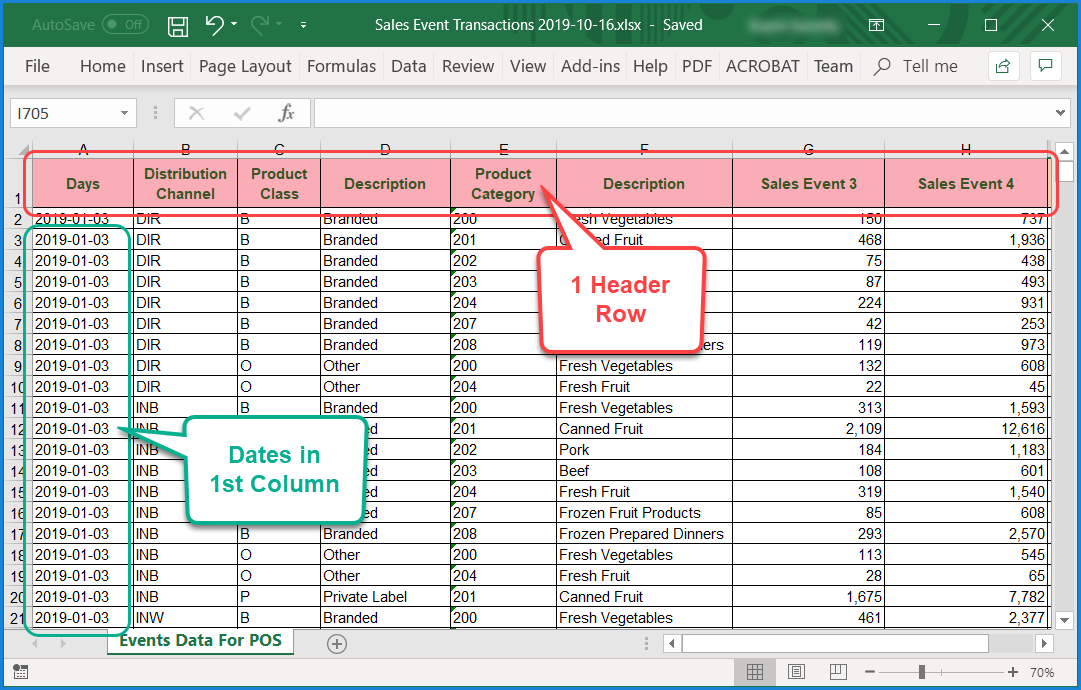
This import file’s transaction dates are in the first column, and the column was given a heading of “Days” in a header row at the top. Header rows have descriptive information that aid in mapping the import data to Stratum data – but information in the header rows don’t get imported. You can include more header rows if needed, but including them in the file is optional for this Transaction type of import.
Note: See Tips For Setting Up Your Excel Import for full detail about how to set up an import file.
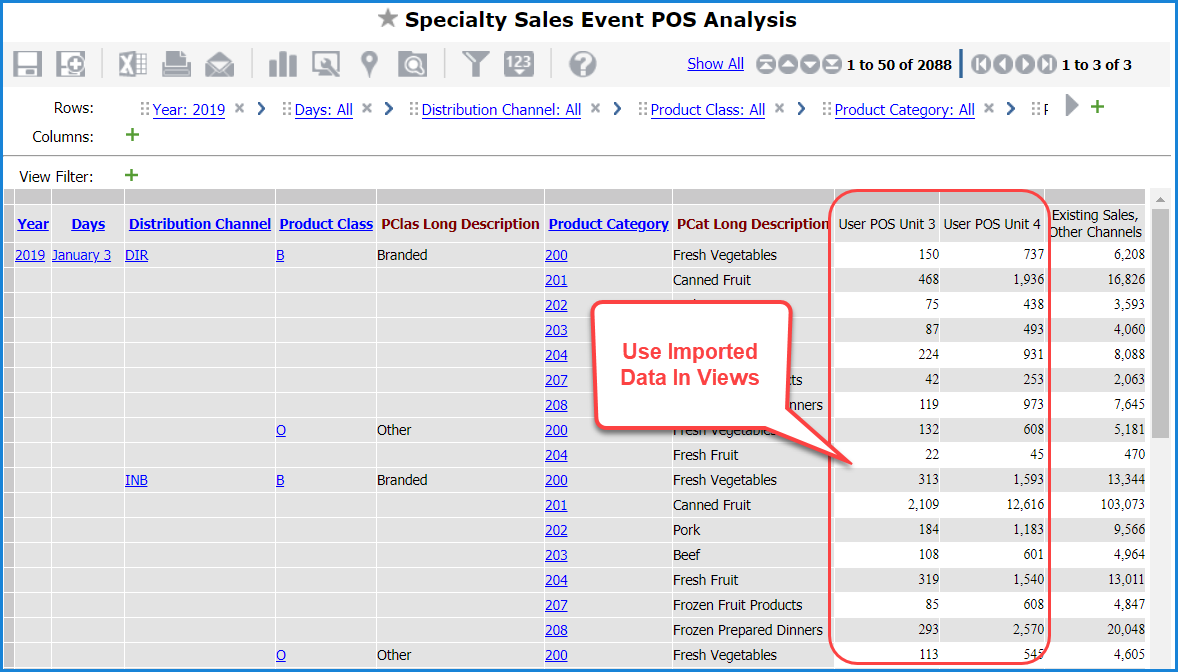
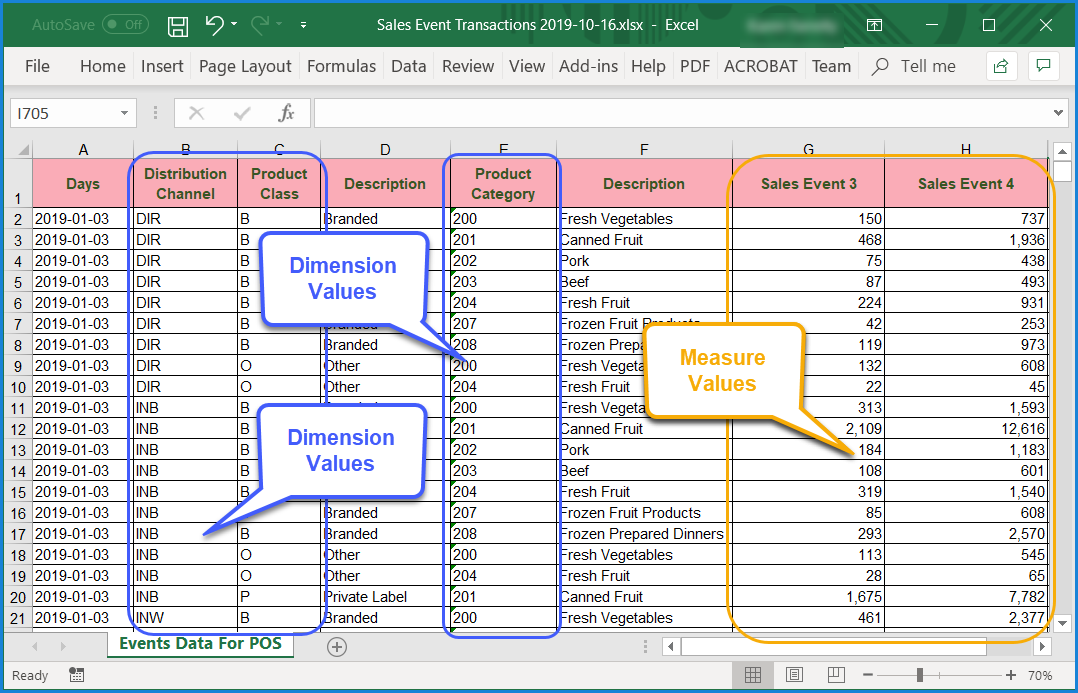
The transaction date tells Data Import the year and period each row of data belongs when it is imported into Stratum. The other columns in the file contain dimension values that tell Data Import where the imported data belongs and contain the actual measure values that will get imported for those dimensions. The user plans to use the imported Sales Event data to populate POS measures.
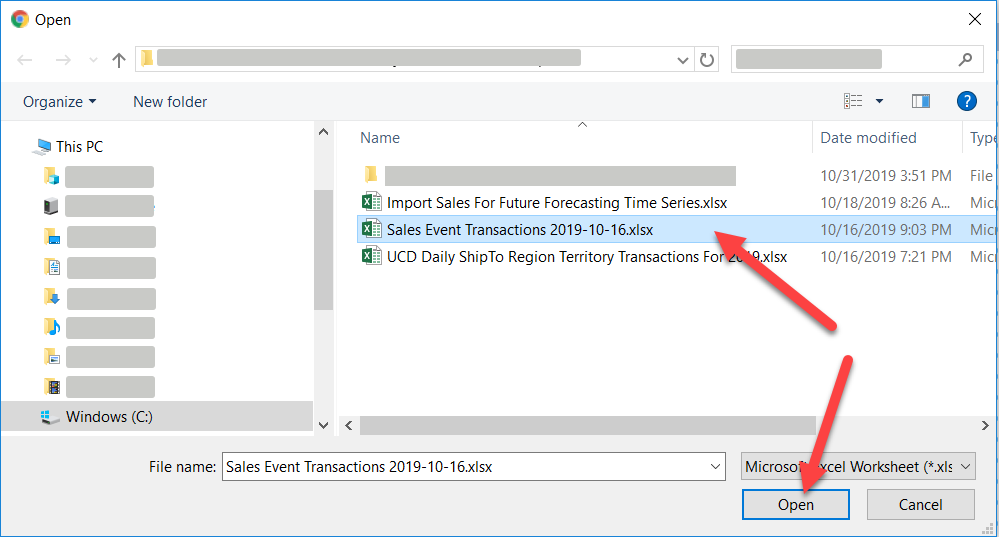
An import starts with choosing the Excel file.
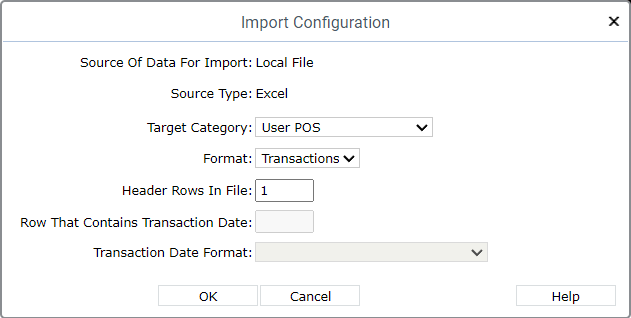
As the file is uploaded, you get prompted to configure the import. This is where you pick the Target category for the import and tell Data Import about import file properties.
Since dates are in every row in this example, type is left at the default of Transactions. There is only one header row in this file, so that property is left at the default of 1. The date format matches the default setting too, so there was nothing to change there.
The import file is uploaded into a mapping window for you to preview and match up import file contents to the Stratum items where they will be imported.
Note: As you do imports over time, Data Import will make some mapping selections for you automatically based on past patterns of what was imported and where it got imported.
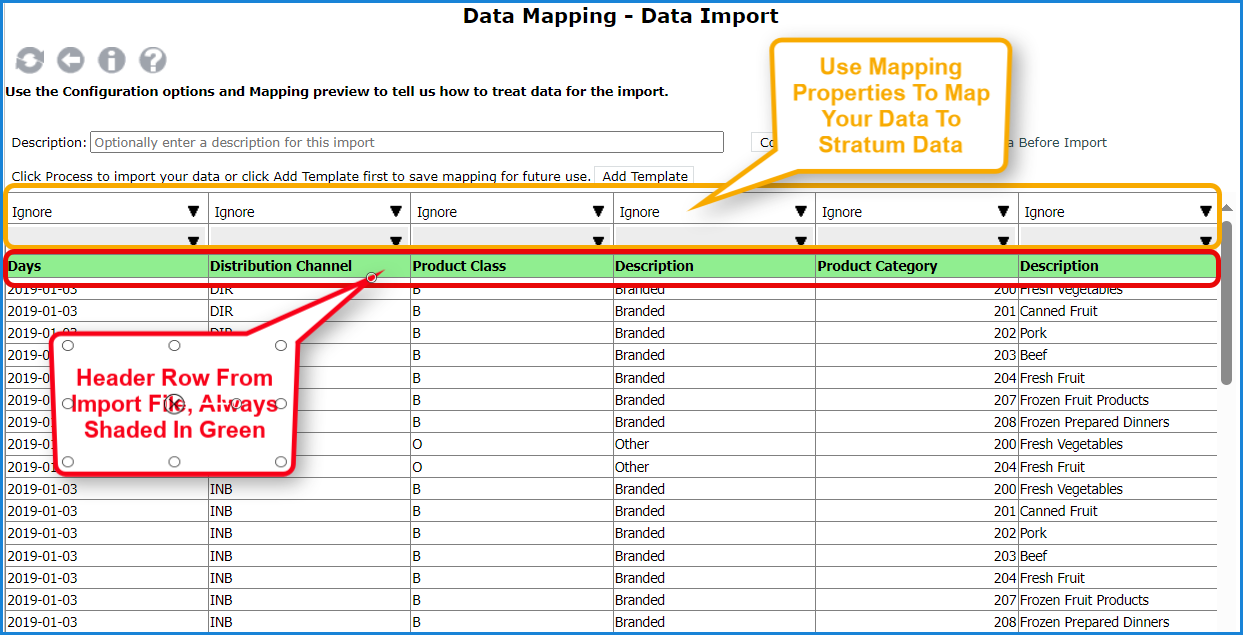
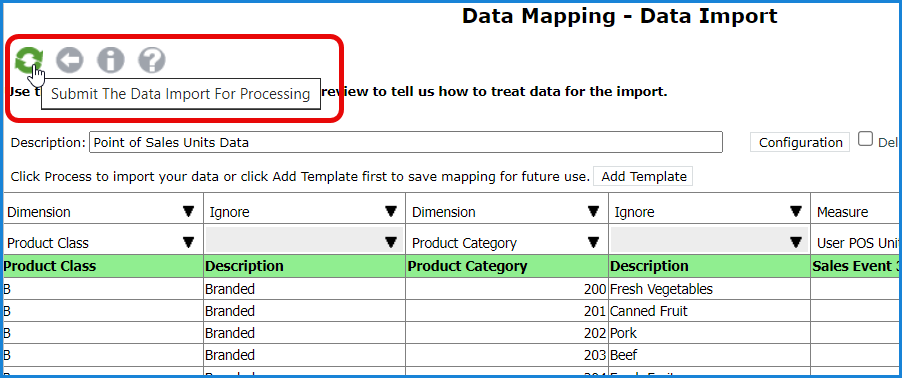
The drop-down lists above the header row are used to identify columns as dates, dimensions, and measures. Columns that don’t need to be imported should be set to Ignore. Here’s the date column being mapped.
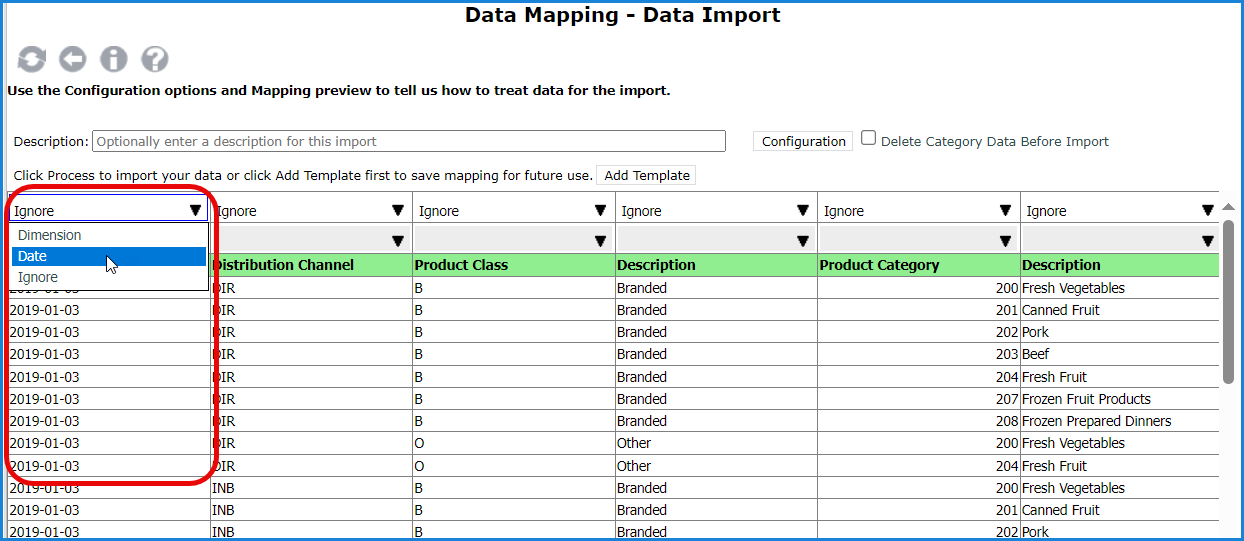
Here’s a dimension column being mapped to Product Class.

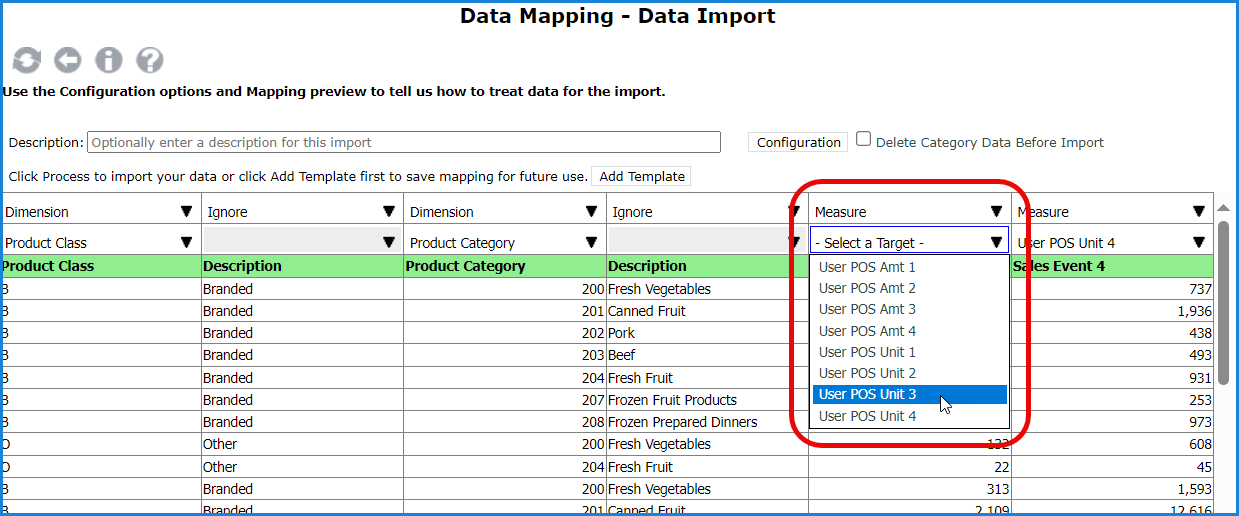
The columns containing dimension descriptions are set to ignore. Finally, here are the measure values being mapped to User POS measures from the Target User POS category.
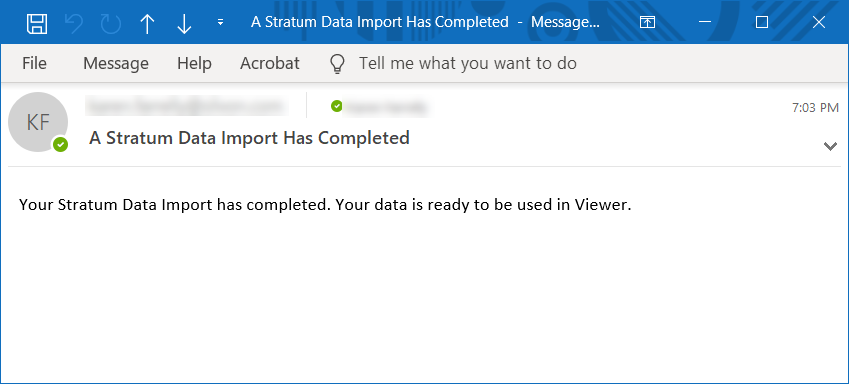
Some validations are done once you submit the import for processing. An email is sent to you once the import has finished processing. The data is ready to use in Stratum once the import has completed.
Here’s the imported data in Viewer, ready for users to analyze in a central spot with other corporate or user supplied data.