|
Toolbar -
|
|
Import Option – Change this option if needed after initial configuration Choose to Add the imported data or Replace existing data with imported data. A Replace clears existing data from ALL measures of the Target category then adds the new data. |
|
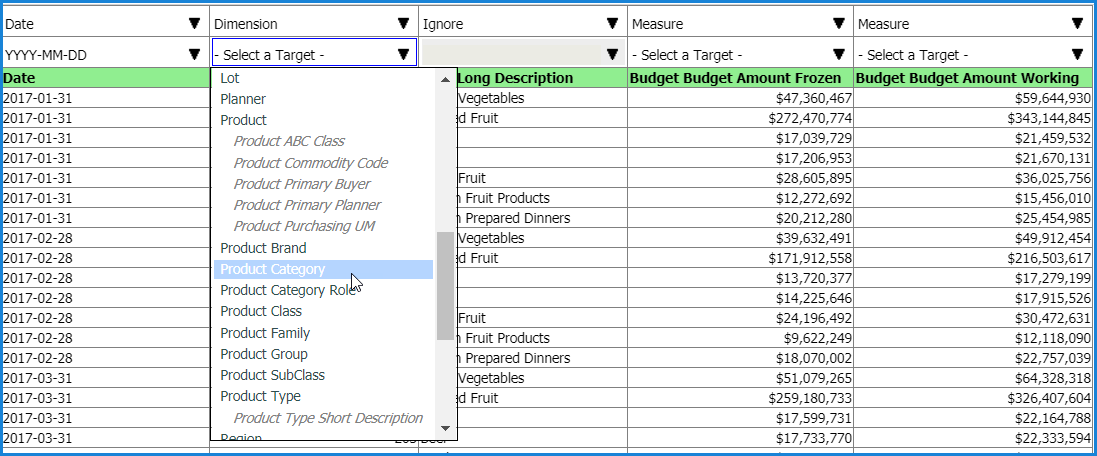
Data Mapping Preview – This section shows up to a 100 row preview of your import file. The drop-down lists in the first two rows are for use in mapping import file data to Stratum – use them to tell Viewer what’s in each column, what to do with the data during the import, and what columns if any to ignore. Row(s) highlighted in green are the start of you import file and are what you told Viewer are the header rows in the file (through a property in Import Configuration). Note: Header rows contain descriptive details that aid you in mapping but do not get imported. For example, the header rows contain dimension names, descriptions, and measure names. This example shows a progression of identifying what’s in your import file using drop-down lists in the mapping window. Note that as you continue to do imports in Viewer after your initial one, some mapping may be done for you automatically based on what Viewer has learned about your prior import habits. You can change automatic selections if needed. First, the preview has no mapping properties selected yet. All columns defaulted to Ignore. By default, Data Import assumes that the import file has one header row.
Drop-down lists at the top were used to identify what’s in each column.
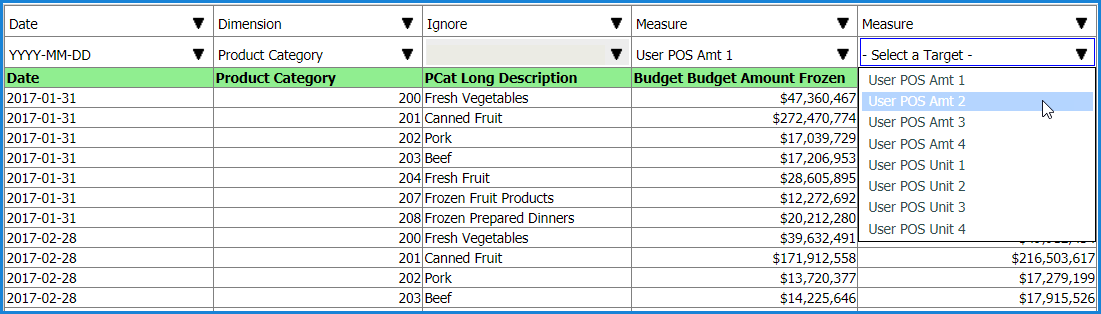
The Target drop-down list under each Measures are used to choose the target Stratum measures to receive the imported data. The mapping is complete, and the user can process the import.
|
|
Validate – Click anytime while mapping your data to validate the mapping. If Viewer encounters something like an invalid date or mapping selections that are required but haven’t been made yet, it will present a message about those issues. Configuration – Click to access the Import Configuration window. From there, you can edit basic properties that tell Viewer things like the type of file being imported (Transactions or Time Series) and how many header rows are in the import file. |
|
Category Information – Click to open details about the category you have identified as the import’s Target category (the one to receive imported data). The window tells you which dimensions you’ve mapped to and identifies others belonging to the category that will be impacted by the import. See the Category Information Window topic to learn about details displayed in this window. |