If you are adding a new measure item by copying an existing one, you will see this Add window populated with properties of the item you’re copying. You can adjust those properties to finish setting up the new measure item. If you are adding new measure items from scratch, see the next image in this topic and the descriptions that follow that image.
Note: If you click Exit in the Add window shown above, you will be asked to confirm that you want to discard the new measure item that you had started to add. No new measure item will be added if you choose Yes in that prompt.
|
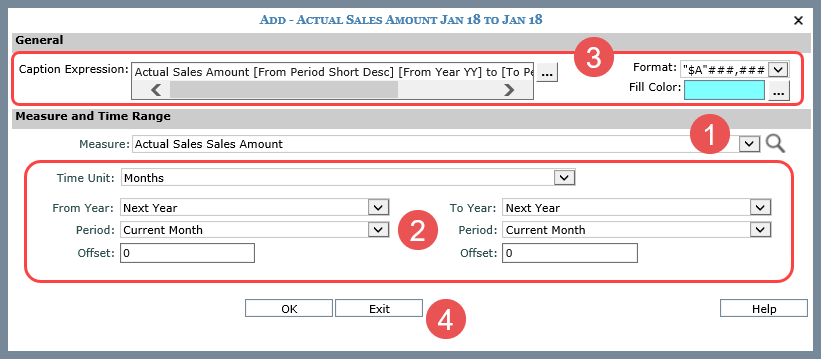
Use the
drop-down list provided if you need to change the measure for
the new measure item. Or, click the Search button |
|
Time properties only display for measure items with time ranges. If needed, use the properties to edit the time range for the measure item.
|
|
General Section – Use this section to set up a custom caption for the measure item and to select a format or fill color for it. Caption Expression – Clicking the Browse
button Format – Choose the format from this drop-down list. Fill Color
– Assign
a fill color that will be used in the row or column containing
the measure item. This makes it stand out from the rest of the
grid. Click the Browse button |
|
OK – Will add the new measure item, returning you to the Measure Items window. Exit – Closes the window and discards the new measure item you were setting up. If you click Exit, you will be asked to confirm that you want to discard the new measure item that you had started to add. No new measure item will be added if you choose Yes in that prompt. |
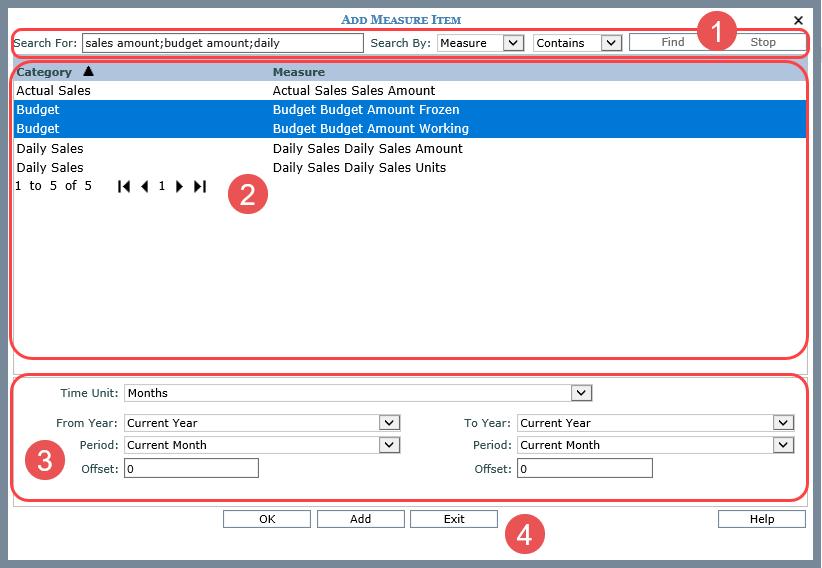
Next is an example and description of the Add Measure Item window when it is used to set up measure items from scratch.
|
Search section - Use the Search For field and values in the Search By drop-down list to narrow down the measures displayed in the window. Search using one or more criteria separated by semicolons (;) and by the category or measure. Additional search specifications can be associated with the search, for example, Contains, Greater Than, or Not Equal To. |
|
Measure section - Select one or more measures to serve as the basis for the measure items that you are inserting. You can use Ctrl+Click and Shift+Click to select more than one measure. Measures are listed by their category, and the section can be sorted. If a search has been executed, the section is refreshed to display search results. The remainder of the window will be populated with information based on the measures you select. |
|
Time Properties - Use the time properties to define time ranges for the measure item(s) that you are setting up. The properties only display if the view you're working with has its main Time Range property set to Yes.
|
|
OK / Add / Exit - OK inserts the measure item(s) and closes the window. Add inserts the item(s) and leaves the window open so you can insert more measure items. Exit closes the window without inserting any items. |


