Filters Window

There are three tabs in this window, used to filter any part of your view. Click to see descriptions of each tab.

Levels Tab

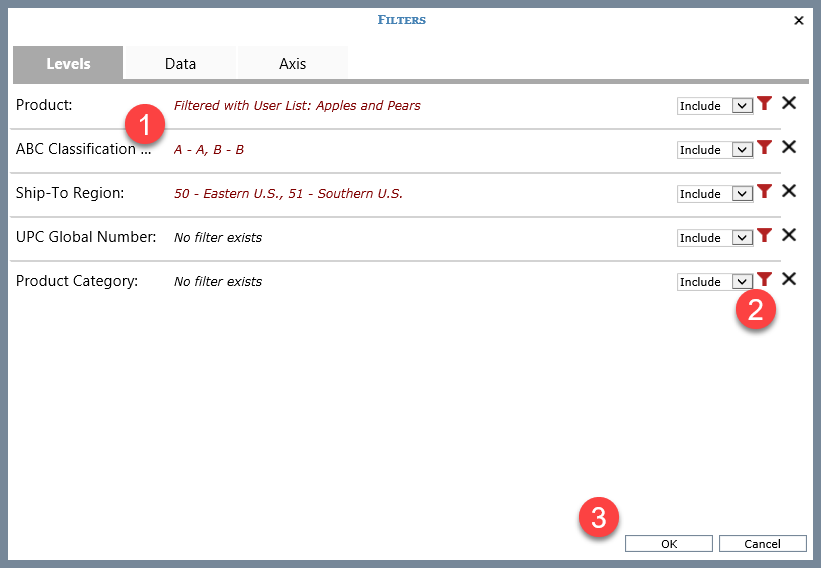
Each level that is available (not hidden) in a view will display in the Levels tab of the Filters window. The level name will be followed by details about any filtering applied to the level. 

  • Member Filter – Members in the filter will be listed after the level name. Ship-To Region and ABC Classification in the previous image have member filters applied to them.

  • User List Filter – The text “Filtered with User List:” will display followed by the name of the user list. The Product level in the previous image has a user list filtered applied to it.

  • Named Set Filter – The text “Filtered with Named Set:” will display followed by the name of the named set.

  • Expression Filter – The text “Filtered with Expression:” will display followed by the expression. .

  • No filter exists – This text will display next to levels that do not have a filter applied to them. This text also displays for cases where a level is filtered but not yet drilled to in the view at the time the Filters window was accessed.

If a level’s filter information has a series of dots “…” at the end of it, click the dots to activate a cursor. This enables you to scroll right and see the rest of the filter details for the level. In this example, the dots for a filtered RepBroker level were clicked.

A cursor displays so you can scroll right and see the names of the rest of the members in the RepBroker member filter.

Each level has icons available for adding, changing, or clearing filters for the respective level plus a drop-down list for determining if the filter will be applied in the Include or Exclude mode.

  • Filter Mode – This drop-down list controls how Viewer treats a member list, user list, expression, or named set filter on a level. Choosing “Include” means the applied filter will return only the members specified by your filter selections/criteria. “Exclude” means the applied filter will return all members except the ones specified by your filter selections/criteria.

  • Change Filter   Click this icon to add or change filter selections or criteria. When you are setting up a new filter, the Select Members window will display. If you want to set up a different type of filter than a member filter, click the More button then choose Change Filter Type and select the filter type from the Select Filter Method window that displays. If you click the icon to change a filter, the window for the type of filter applied to the level will display. For example, if the level has a user list filter applied to it, the Select User List Filter window will display.

  • Clear Filter   Click this icon to remove a filter for a level.

OK – Click OK to apply all the changes that you made in the Filters window. Changes made on any tabs will be applied to the view.

Cancel – Click Cancel to close the window without applying your changes.

Data Tab

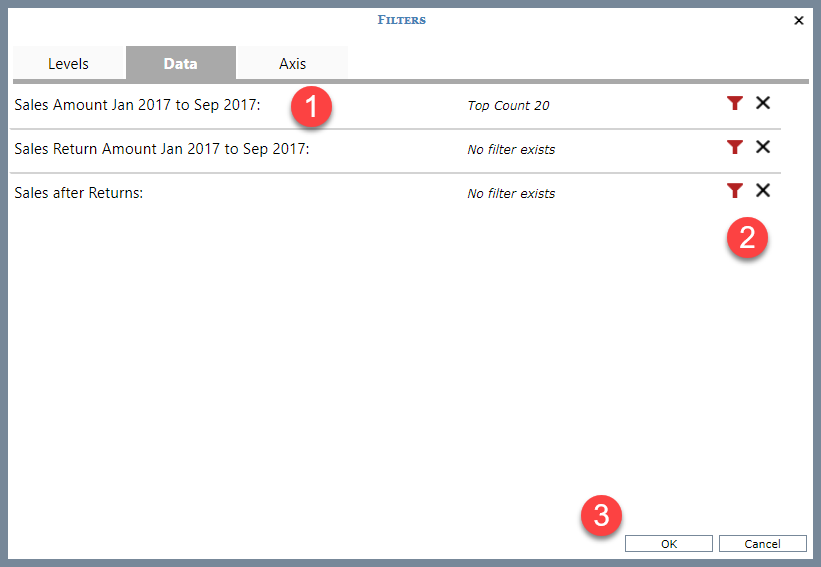
Each measure item included in the view will display in the Data tab of the Filters window. The measure item name will be followed by details about any filtering applied to the measure item.

  • Top Count, Top Percent, Top Sum

  • Bottom Count, Bottom Percent, Bottom Sum

  • Recursive Top/Bottom Count, Percent, Sum

  • Overall Top / Bottom Count, Percent, Sum

  • No filter exists – This text will display next to measure items that do not have a filter applied to them.

Each measure item has icons available for adding, changing, or clearing filters for the respective measure item.

  • Change Filter   Click this icon to add or change a filter. When you are setting up a new filter, the Measure Item Filter window will display.

  • Clear Filter   Click this icon to remove a filter.

OK – Click OK to apply all the changes that you made in the Filters window. Changes made on any tabs will be applied to the view.

Cancel – Click Cancel to close the window without applying your changes.

Axis Tab

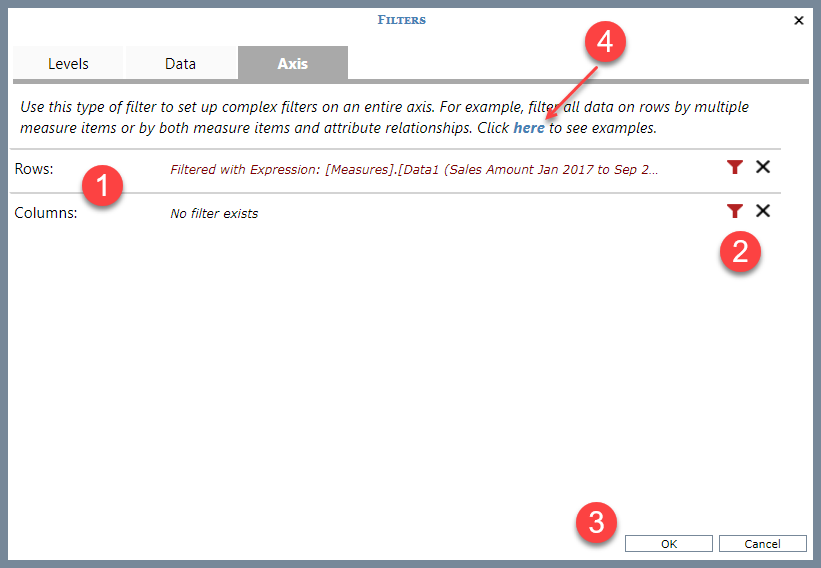
Set up filters on the rows or columns axis using the Axis tab.

Use axis filters when you need to set up filters involving multiple measure items or both measure items and attribute relationships. For example, use an axis filter to return all rows that fit the criteria of two different measure items -- such as all rows where Sales Units are greater than 1,000 and Profit Margin is less than 20%.

  • Filtered with Expression – If a filter exists, the filter expression displays next to the Rows and Columns section of this tab.

  • No filter exists – This text will display next to an axis is it does have a filter applied to them.

If axis filter information has a series of dots “…” at the end of it, click the dots to activate a cursor. This enables you to scroll right and see the rest of the filter details for the axis.

Each axis has icons available for adding, changing, or clearing filters for the respective axis.

  • Change Filter   Click this icon to add or change a filter. When you are setting up or editing a filter, the Expression window will display.

  • Clear Filter   Click this icon to remove a filter for an axis.

OK – Click OK to apply all the changes that you made in the Filters window. Changes made on any tabs will be applied to the view.

Cancel – Click Cancel to close the window without applying your changes.

 - Example expressions are available to review or even copy and paste into your expression definition.