If you are adding a new measure item by copying an existing one, this window is populated with properties of the item you’re copying You can adjust those properties to finish setting up the new measure item.
|
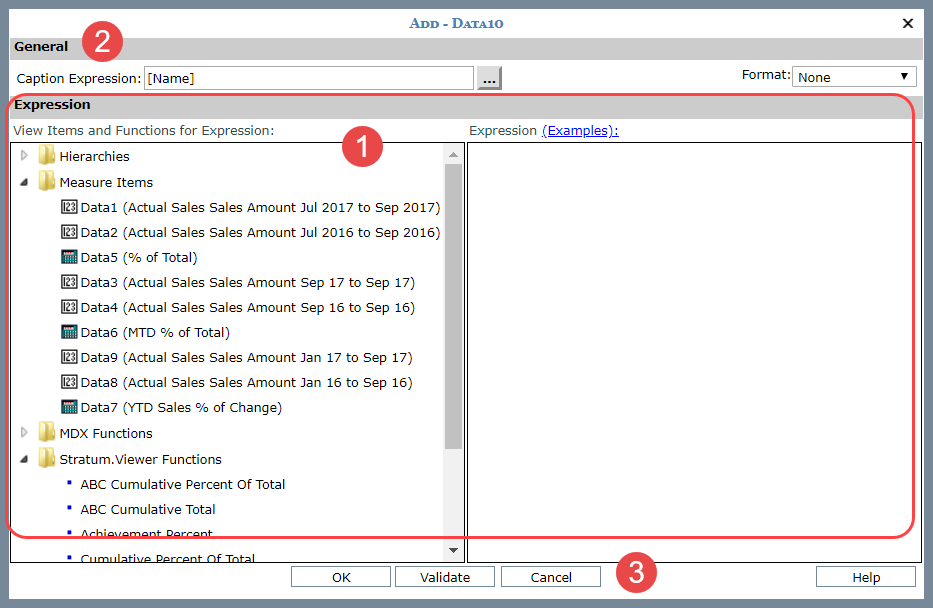
Expression Section – Use this part of the window to build the expression for the calculated measure item. Objects selected from the View Items and Functions for Expression portion of the window display in the Expression section on the right side of this window. You can also add objects to the expression by typing directly in the space provided on the right side of the window. Objects available to work with as you build your expression are described below. Hierarchies Folder – Hierarchies, levels, and attribute relationships that are part of the view definition are in list in the Hierarchies folder. They appear in the same order as in the view explorer and regardless of whether or not they are visible or actively showing in the grid. The Levels folder can be expanded to see the Attribute Relationships and Members folders. If attribute relationships were selected for the level, they will display when the Attribute Relationships folder is expanded.
When you add objects in this manner to the expression, they are added in MDX format. That format includes a reference to the object dimension and hierarchy. The standard MDX format for objects commonly used in expressions follows.
Measure ItemsFolder – The Measure Items folder lists all the measure items associated with the view. Each measure item displays as Name (Caption). The name is the unique identifier associated with the measure item, which can be seen in the Properties window for the measure item. The caption makes it user friendly. They appear in the same order as in the view explorer. You can include measure items as part of the expression using any of the following methods:
[Measures].[Name(Caption)] MDX Functions Folder – A Functions folder provides you with logical, member, numeric, set, tuple, and VBA functions that can be used for building the calculated or distinct calculated measure item expression. You can select a function by clicking, double clicking, or drag and drop. You can also key in a function directly in the Expression portion of the window. If you select a function for your expression, then the formula for it will display in the Expression section and each parameter will be enclosed in double arrows (<< >>). Function parameters enclosed in double arrows, such as «PARAMETER», are required. Parameters enclosed in brackets and double arrows, such as [«PARAMETER»], are optional. You can highlight each parameter and type over it directly in the Expression section. Or you can click the needed element from the tree structure in the window and it will be inserted into that section of the function. Stratum.Viewer Functions Folder – This folder includes custom Stratum.Viewer functions that serve as shortcuts for building commonly used calculations, such as cumulative and percent of total functions. If you use them in an expression, they will be preceded by a pound sign (#) to distinguish them from standard MDX functions. The Stratum.Viewer specific functions are:
There are pop-up labels for all functions, and they give you a brief description of the functions. |
|
General Section – Use this section to set up a custom caption for the calculated measure item and to select a format for it. Caption Expression – Clicking the Browse
button Format – Choose the format from this drop-down list. |
|
Validate – Click the Validate button at any point while you are building the expression. Stratum.Viewer will verify whether or not the format of your expression is valid. If you do not click the Validate button while building the expression, then validation will be performed once you click the OK button. OK / Cancel – Click OK to add the measure item or Cancel to discard the measure item you were setting up. Help – Click Help or the Examples link in the Expression section to access example expressions for calculated measure items. |


