![]()
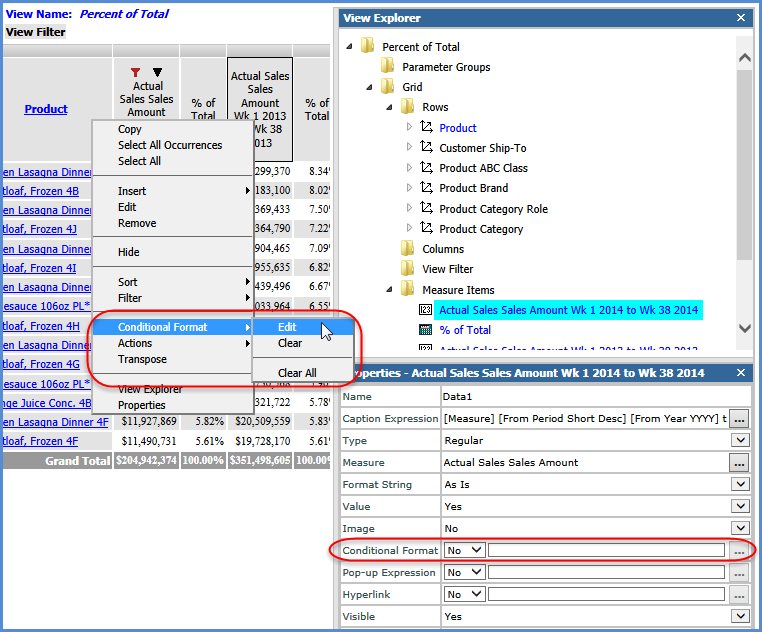
From the measure item Properties window, access the Select Conditional Format window by changing the Conditional Format field from No to Yes, or by clicking the Browse button when a conditional format is currently assigned.
Note: Another option is to right-click the caption for any measure item in the view, and select Conditional Format then Edit.
![]()
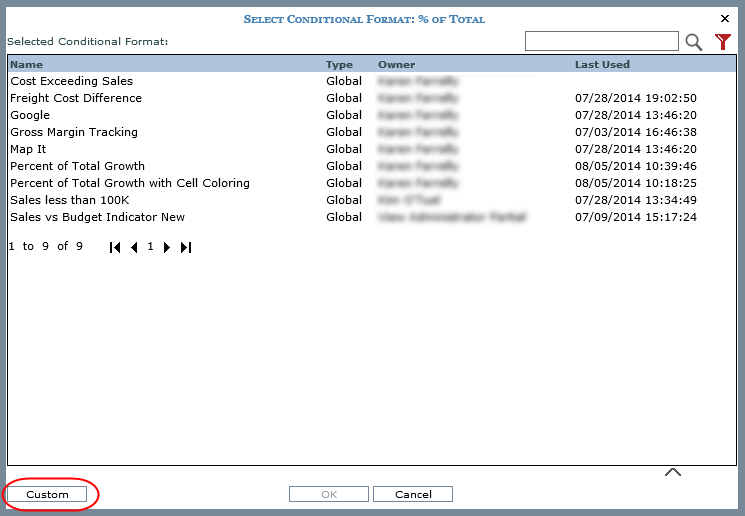
From the Select Conditional Format window, click the Custom button to access the Custom Conditional Format window.
![]()
 Specify name for the custom conditional format, and specify a
description.
Specify name for the custom conditional format, and specify a
description.
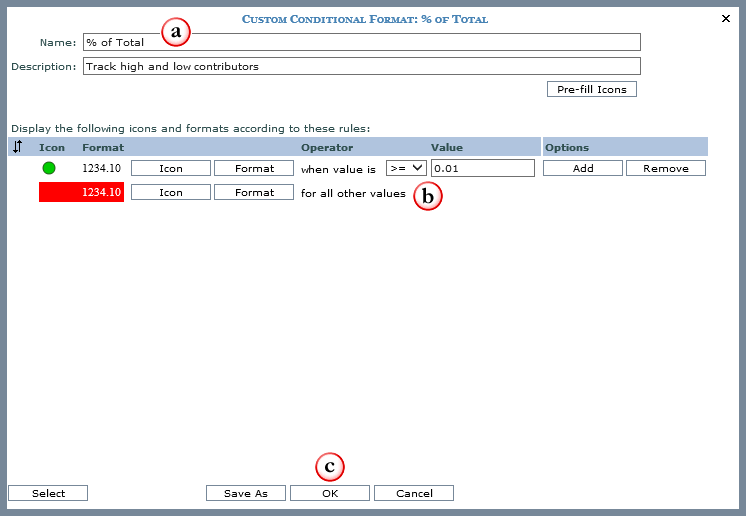
 Define the
rule(s) of the custom conditional format, including any text or
cell coloring as well as any icon that will display based on satisfying
the associated rule.
Define the
rule(s) of the custom conditional format, including any text or
cell coloring as well as any icon that will display based on satisfying
the associated rule.
 Click OK to redisplay the view with the custom conditional format
applied.
Click OK to redisplay the view with the custom conditional format
applied.
Note: Custom conditional formats are intended to be used only one time and are only associated with a single measure item. They are not available for use in other views or by other users. The Save As functionality is available if you wish to create a conditional format definition from a custom conditional format.