 in
the existing view.
in
the existing view.Options for designating a view as ‘shared’ follow. Once you designate a view as shared, it will appear in its selected View Group in the left panel. You can use the Stratum.Viewer Email View functionality in a view to let other users know it’s ready. Include the view link and the name of the view group in the email.
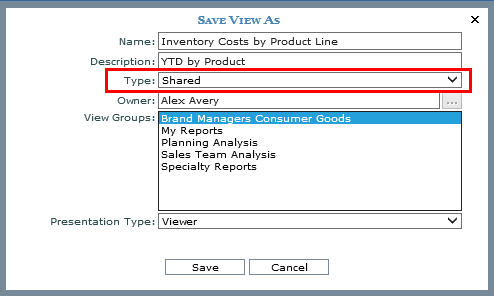
Designating a view as ‘shared’ can be done from the Save As window while creating a new view from an existing view.
1. Click Save As  in
the existing view.
2. While setting up properties for the new view in the Save View As window, choose Shared for the Type and choose a view group to which the view’s intended users have access.

3. When you have set up all the properties, click Save in the Save View As window.
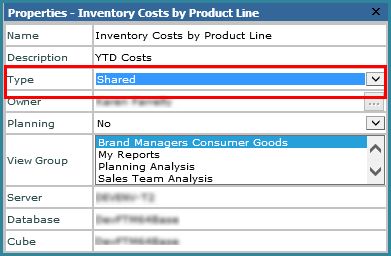
A view’s main Properties window can be used to designate the view as ‘shared’. This option only applies to users who can access view explorer and Properties windows (advanced users and administrators).
1. Use
the Show/Hide View Explorer button  in the view toolbar to display
view explorer.
2. Double-click the folder for the view name in view explorer.
3. Choose Shared for the Type property in the Properties window that displays.

4. Click
OK in the Apply Changes window and save the view  .
.